Mastering the art of cooking requires understanding how to achieve both crispness and moisture retention simultaneously—a skill that transforms ordinary dishes into culinary masterpieces.
Every home cook and professional chef faces this fundamental challenge: creating dishes with perfectly crispy exteriors while maintaining juicy, tender interiors. Whether you’re roasting a chicken, baking bread, or preparing vegetables, this delicate balance determines the difference between mediocre and exceptional food. The science behind achieving this perfect equilibrium involves understanding heat transfer, moisture management, and proper cooking techniques.
This comprehensive guide explores the principles, methods, and practical applications that will revolutionize your approach to cooking. By understanding the relationship between temperature, timing, and technique, you’ll consistently create dishes that satisfy both textural expectations and flavor profiles.
🔬 The Science Behind Texture and Moisture
Understanding the chemical reactions that occur during cooking is essential for achieving optimal results. When heat is applied to food, multiple processes happen simultaneously, each affecting the final texture and moisture content.
The Maillard reaction, which occurs at temperatures above 285°F (140°C), creates that desirable golden-brown crust and complex flavors. This reaction happens when amino acids and reducing sugars interact under heat, producing hundreds of flavor compounds. Meanwhile, water molecules within the food are either retained or evaporated, depending on cooking temperature and duration.
Proteins coagulate and tighten when heated, squeezing out moisture like wringing a sponge. Fats melt and can either baste the food internally or escape, taking moisture with them. Starches gelatinize, absorbing water and creating structure. Understanding these processes allows you to manipulate cooking conditions to achieve your desired outcome.
Temperature Zones That Matter
Different temperature ranges produce dramatically different results. The “danger zone” for bacterial growth (40°F-140°F) isn’t just about food safety—it’s also where enzymatic activity affects texture. The sweet spot for moisture retention often falls between 135°F-155°F for proteins, while crispness typically requires surface temperatures exceeding 300°F.
This temperature differential is key to achieving both qualities simultaneously. The exterior must reach high temperatures while the interior remains at moderate levels. This is why resting meat after cooking is crucial—it allows temperature equalization without overcooking the exterior.
🍗 Protein Preparation: The Foundation of Success
Proteins present the greatest challenge in balancing crispness and moisture. Whether cooking poultry, beef, pork, or fish, the principles remain consistent, though the specific techniques vary.
Dry brining revolutionizes protein preparation. By salting meat several hours or overnight before cooking, you enable salt to penetrate deeply, dissolving some proteins and creating a matrix that holds moisture even under high heat. This technique works for everything from steaks to whole turkeys.
The salt initially draws moisture to the surface, then that moisture—now containing dissolved salt—is reabsorbed along with the salt. This process seasons the meat throughout while restructuring proteins to retain more moisture during cooking. A general guideline is ½ to ¾ teaspoon of kosher salt per pound of meat.
The Two-Stage Cooking Method
This technique separates the goals of cooking: first achieving the correct internal temperature, then creating the crispy exterior. Reverse-searing steaks exemplifies this perfectly—slow-roast at low temperature (200°F-275°F) until the internal temperature reaches about 10°F below your target, then sear in a scorching-hot pan or grill.
For poultry, this might mean roasting at moderate temperature until nearly done, then finishing under a broiler or in a very hot oven. The initial gentle cooking retains moisture while gradually rendering fat and firming proteins. The final blast of high heat creates the crispy skin without overcooking the meat.
🥖 Baking: Where Chemistry Becomes Art
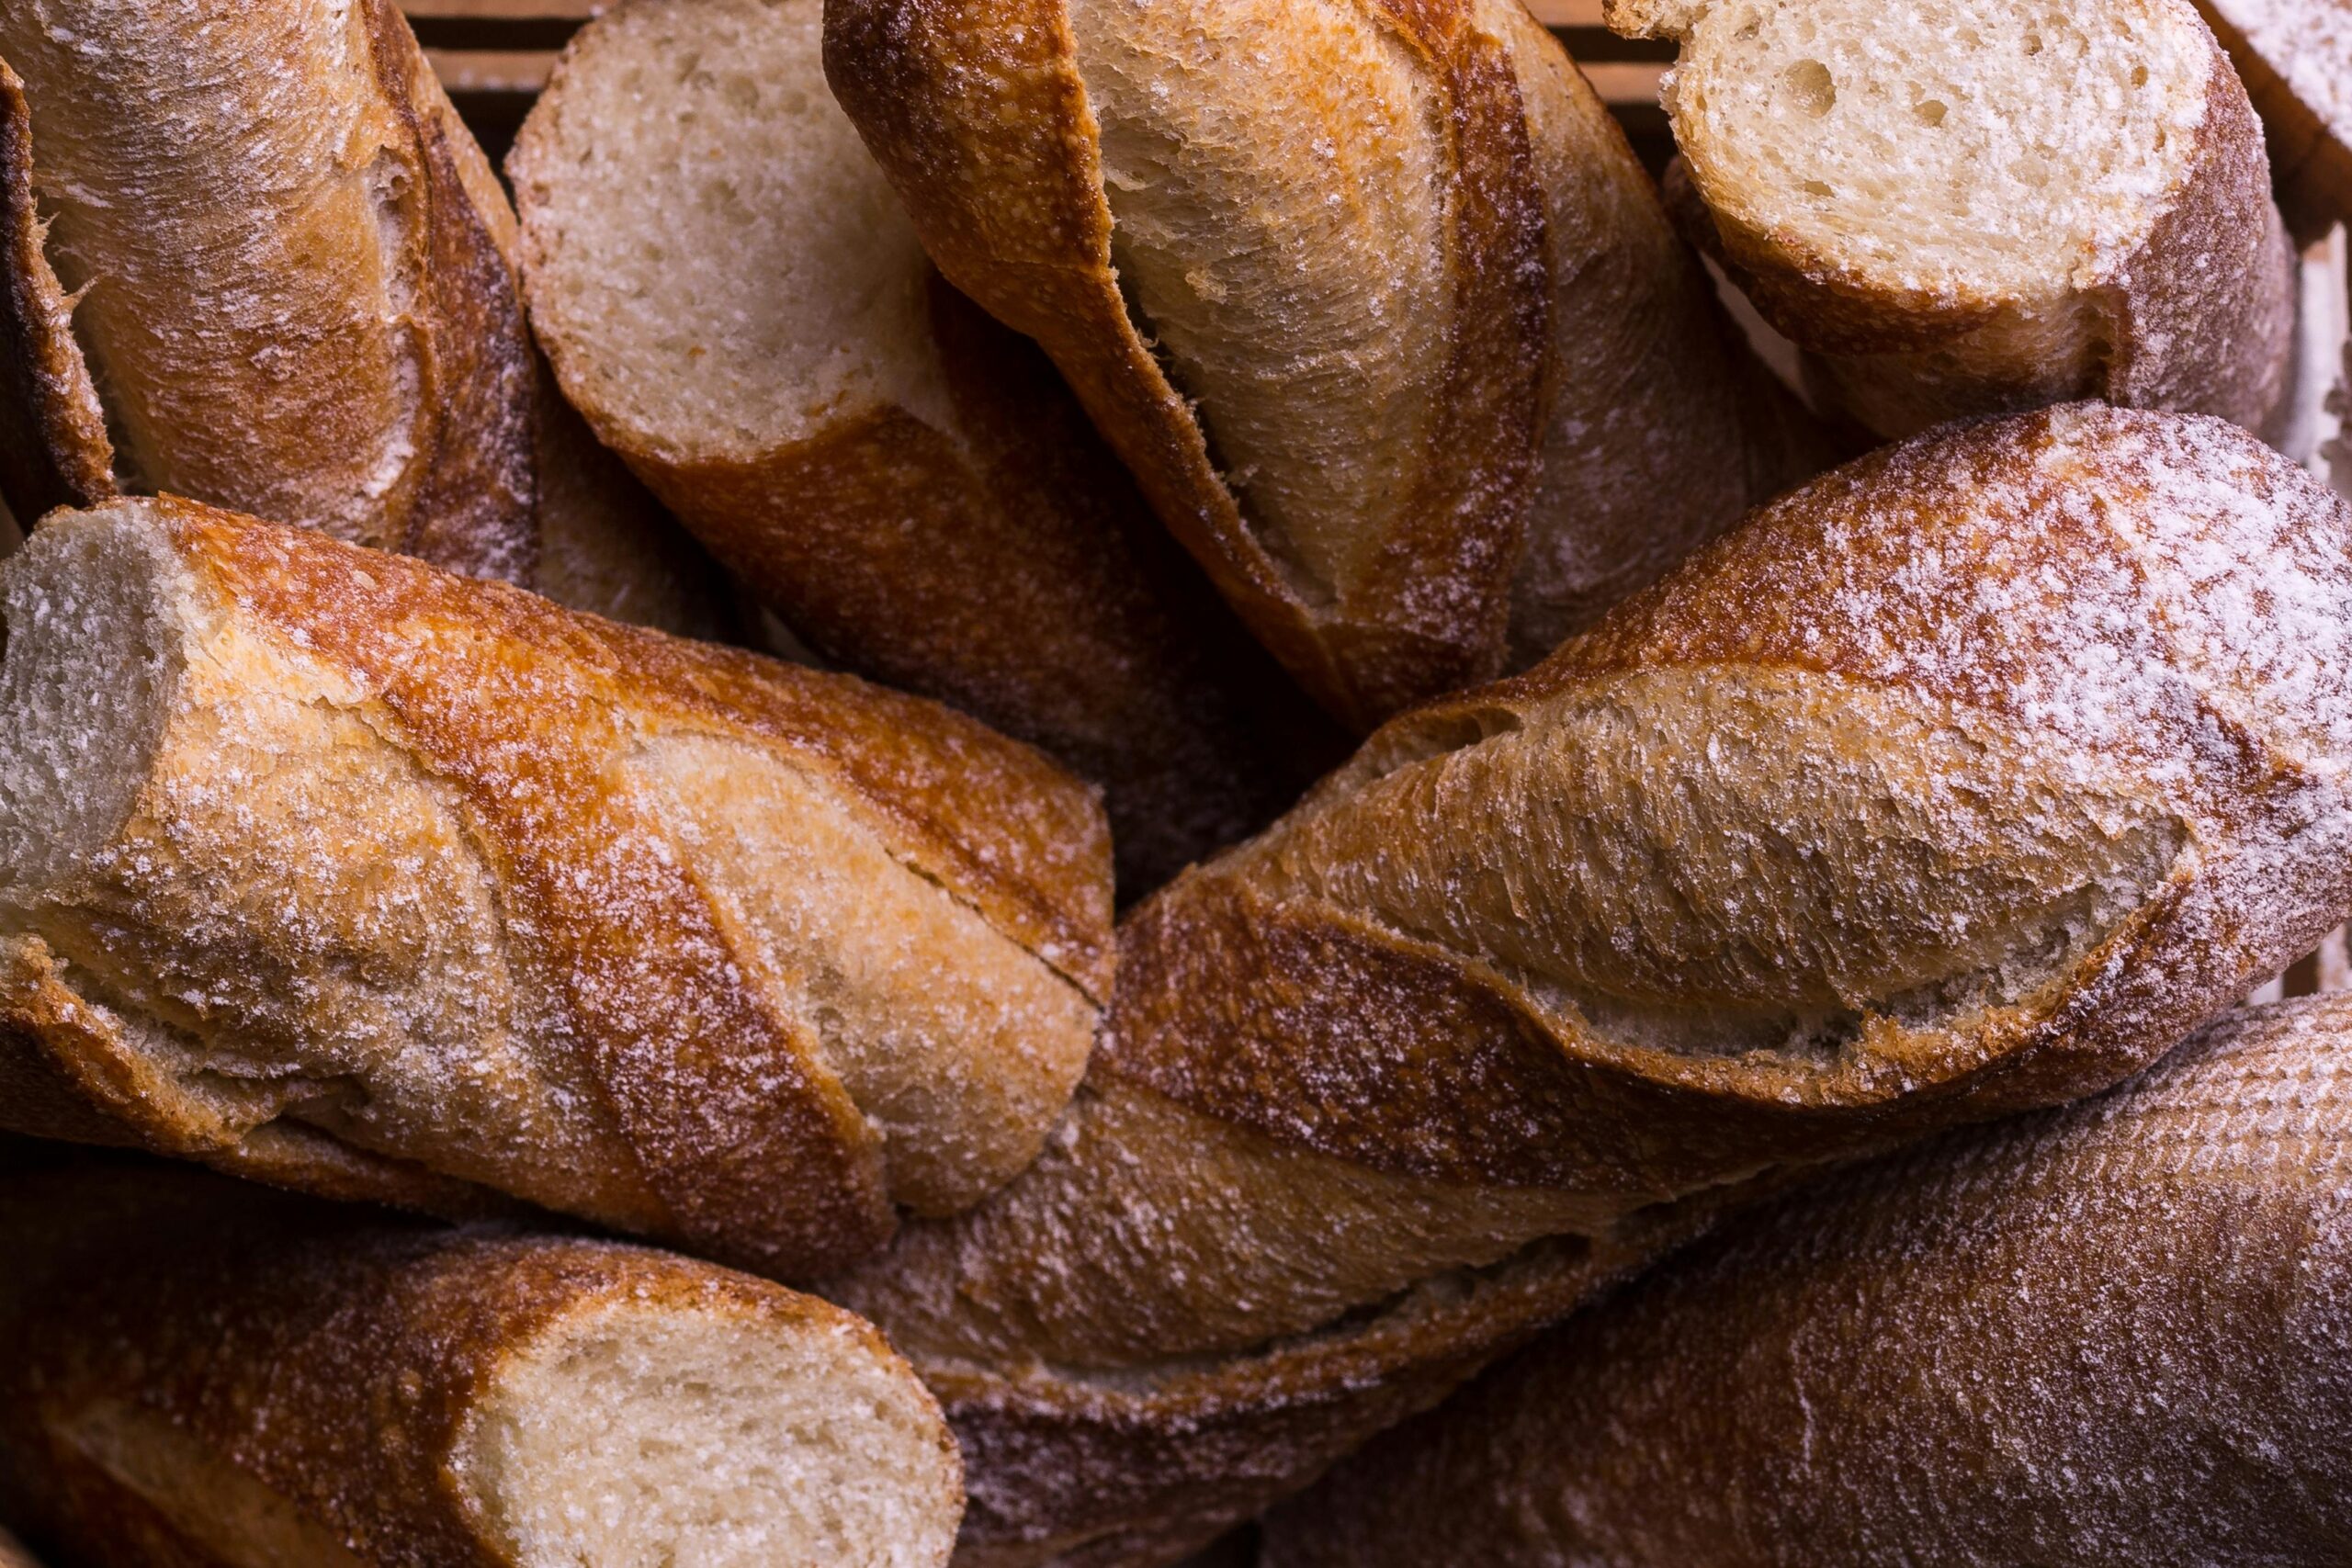
Bread baking perfectly illustrates the crispness-moisture balance. The ideal loaf features a crackling crust and a tender, slightly moist crumb—two seemingly contradictory qualities achieved through precise technique.
Steam plays a crucial role during the first phase of baking. Professional bakeries inject steam into their ovens because it keeps the exterior of the dough flexible longer, allowing maximum oven spring (the rapid expansion of dough when first exposed to heat). The steam also promotes starch gelatinization on the surface, which later transforms into that glossy, crispy crust.
Home bakers can replicate this by placing a pan of water in the oven, spraying the loaves with water before baking, or using a covered Dutch oven for the first portion of baking. After 15-20 minutes, remove the steam source to allow the crust to dry and crisp.
Hydration Ratios and Crumb Structure
The ratio of water to flour in your dough directly affects the final texture. Higher hydration doughs (75-85% water relative to flour weight) create more open crumb structures with larger air pockets and chewier textures, while lower hydration produces tighter, more uniform crumbs.
For crusty breads like baguettes or ciabatta, higher hydration is essential. For sandwich breads meant to retain softness, lower hydration and added fats work better. Understanding this relationship allows you to adjust recipes based on your desired outcome.
🥔 Vegetable Mastery: Maximizing Natural Qualities
Vegetables contain varying amounts of water, sugars, and starches, each requiring different approaches to achieve optimal texture. Root vegetables, leafy greens, and fruiting vegetables all respond differently to heat and moisture management.
For naturally starchy vegetables like potatoes, the goal is often achieving a crispy exterior while maintaining a fluffy, moist interior. The secret lies in surface starch management. Parboiling potatoes before roasting accomplishes two things: it partially cooks the interior, reducing overall roasting time, and it roughens the surface, creating more area for crisping.
After parboiling, drain thoroughly and let potatoes steam-dry for a few minutes. Toss with fat (oil, duck fat, or clarified butter) and roast at high temperature (425°F-450°F). The combination of pre-cooked interiors and high-heat exteriors creates the perfect contrast.
The Pat-Dry Principle
Water is the enemy of crispness. Before cooking any vegetable where you desire a crispy exterior, remove surface moisture thoroughly. Use paper towels, clean kitchen towels, or even a salad spinner for leafy items.
This principle applies whether you’re sautéing, roasting, or frying. Excess surface moisture must evaporate before the Maillard reaction begins, wasting energy and time while steaming rather than browning your vegetables. For vegetables you’ve washed, allow them to air-dry for 30 minutes or pat them completely dry before cooking.
🍳 Equipment and Tools That Make the Difference
The right equipment significantly impacts your ability to achieve perfect texture balance. While technique matters most, appropriate tools make consistent success much easier.
Cast iron and carbon steel pans retain heat exceptionally well, maintaining high surface temperatures even when cold food makes contact. This quality is essential for achieving proper sears and crispy surfaces. Stainless steel also works well, particularly tri-ply versions with aluminum cores for even heat distribution.
Nonstick pans, while convenient, don’t reach the high temperatures necessary for optimal browning and crisping. Reserve them for delicate items like eggs and fish where sticking is a greater concern than crispness.
Oven Considerations
Convection ovens circulate air continuously, removing the moisture-saturated air around food and replacing it with dry heat. This promotes both faster cooking and superior crisping. If your oven has a convection setting, use it for roasting vegetables, baking pastries, and cooking proteins where crispy skin is desired.
Oven thermometers verify accuracy, as many ovens run 25°F or more off their displayed temperature. This discrepancy can ruin carefully planned cooking strategies. Invest in a reliable oven thermometer and adjust your temperature dial accordingly.
💧 Fat: The Moisture and Crispness Mediator
Fat plays multiple roles in achieving textural balance. It conducts heat efficiently, helps achieve higher surface temperatures than possible with dry heat alone, adds flavor, and creates a moisture barrier that can help retain internal juices.
Different fats have different smoke points—the temperature at which they break down and smoke. For high-heat cooking where crispness is the goal, choose fats with high smoke points: refined avocado oil (520°F), clarified butter or ghee (450°F), or refined peanut oil (450°F).
For roasting, fat coats the food’s surface, promoting even browning and preventing sticking. The fat also carries fat-soluble flavor compounds, enhancing taste. When roasting vegetables or proteins, use enough fat to coat items lightly but completely—usually 1-2 tablespoons per pound of food.
Butter: The Delicious Exception
Whole butter contains milk solids that brown beautifully and add nutty flavors, but its low smoke point (350°F) limits its use for high-heat cooking. The solution? Add butter toward the end of cooking or combine it with high-smoke-point oils.
For pan-searing, start with oil, achieve your sear, then add butter for the final moments while basting. The butter flavors the food without burning during the initial high-heat phase. This technique gives you both the high-heat capability of oil and the flavor complexity of butter.
⏱️ Timing Techniques for Perfect Results
Proper timing separates good cooking from great cooking. Understanding when to apply heat, when to rest food, and how long each phase should last is crucial for achieving both crispness and moisture retention.
Carryover cooking continues after you remove food from heat. Large roasts can increase 10°F or more during resting, while smaller items like chicken breasts might gain 5°F. Always remove food from heat before it reaches your target temperature—this prevents overcooking and moisture loss.
Resting serves multiple purposes. It allows juices, which have been driven toward the center by heat, to redistribute throughout the meat. It also permits temperature equalization, so you don’t have overcooked exteriors and undercooked centers. Rest large roasts 15-30 minutes, steaks 5-10 minutes, and chicken breasts 5 minutes.
The Poke-and-Check Method
While instant-read thermometers provide accuracy, developing tactile sensitivity helps you cook more intuitively. Gently pressing food tells you about its internal state: soft means rare or underdone, slight resistance indicates medium, and firm means well-done or fully cooked.
Practice this technique alongside thermometer use until you develop reliable instincts. The goal isn’t abandoning temperature measurement but developing a supplementary sense that helps you cook more responsively.
🌡️ Temperature Control Strategies
Controlling temperature—both cooking temperature and food temperature—is fundamental to achieving perfect texture balance. This control begins before cooking starts and continues until you serve the dish.
Tempering, or bringing food to room temperature before cooking, ensures even cooking. A steak straight from the refrigerator (about 38°F) has a much lower starting temperature than one that’s sat out for 30-45 minutes (about 60°F). That difference affects how quickly the interior cooks relative to the exterior.
Cold food dropped into a hot pan dramatically lowers the pan’s surface temperature, potentially causing sticking and preventing proper searing. Room-temperature food minimizes this temperature drop, maintaining the heat necessary for browning and crisping.
Zone Cooking for Ultimate Control
Whether grilling, roasting, or pan-cooking, creating temperature zones gives you flexibility. On a grill, push coals to one side, creating a hot direct-heat zone and a cooler indirect zone. In an oven, understand that top shelves run hotter than bottom ones.
This setup allows you to sear over high heat, then move food to lower heat to finish cooking gently. It prevents the common problem of burned exteriors with raw interiors, giving you control over both the crisping and cooking phases.
🎯 Common Mistakes and How to Avoid Them
Even experienced cooks fall into traps that sabotage their efforts to achieve perfect texture. Recognizing these pitfalls helps you avoid them and troubleshoot when results don’t meet expectations.
Overcrowding pans is perhaps the most common mistake. When too much food occupies too little space, items steam rather than brown. Moisture released during cooking can’t evaporate quickly enough, accumulating in the pan and preventing the high surface temperatures necessary for crisping. Always leave space between items—they shouldn’t touch.
Moving food too frequently disrupts crust formation. When protein or vegetables hit a hot pan, they stick initially, then release naturally once a crust forms. Patience during this phase is essential. Resist the urge to poke, prod, or flip until the food releases easily.
The Lid Dilemma
Covering food traps moisture, which can be beneficial for braising and steaming but detrimental when seeking crispness. Use lids strategically: cover during the initial cooking phase to retain moisture and speed cooking, then uncover to allow moisture evaporation and surface crisping.
For oven roasting, loosely tenting with foil can protect items from over-browning while still allowing some moisture escape. Tight covering creates an entirely different cooking environment—essentially steaming rather than roasting.
🥇 Bringing It All Together: Practical Application
Understanding principles means little without practical application. Let’s synthesize these concepts into actionable strategies you can implement immediately.
Start every cooking session with a plan that addresses both crispness and moisture retention specifically. For a roast chicken, this might mean: dry-brining overnight, bringing to room temperature before cooking, starting in a moderate oven to cook through, then finishing at high heat or under the broiler for crispy skin. Each step serves a specific purpose in your textural goals.
Document your results. Note what worked and what didn’t, along with specific temperatures, times, and techniques used. This practice builds your personal cooking knowledge base, making you increasingly skilled at predicting and controlling outcomes.
Experiment systematically rather than randomly. Change one variable at a time—cooking temperature, resting time, or preparation method—so you understand each factor’s impact. This scientific approach accelerates your learning and builds genuine expertise.
🌟 Elevating Everyday Dishes Through Better Technique
These principles transform everyday staples when applied consistently. A simple pan-seared chicken breast becomes restaurant-quality when properly dried, seasoned, brought to room temperature, seared in a hot pan with high-smoke-point oil, then finished gently and rested. Each step is simple, but together they create dramatically superior results.
The same roasted vegetables you’ve made dozens of times achieve new heights when you thoroughly dry them, toss with adequate fat, spread them without crowding, and roast at high heat. The difference between mediocre and exceptional often lies not in exotic ingredients or complicated recipes, but in attention to fundamental technique.
Commit to applying these principles consistently for one month. You’ll notice improvements not just in specific dishes but in your overall cooking intuition. The balance between crispness and moisture retention will become second nature, something you achieve through instinct developed through understanding and practice.
Mastering this balance isn’t about rigid rules but about understanding principles that guide your decisions in the kitchen. Every ingredient, every dish, and every cooking environment presents unique variables. With solid foundational knowledge, you can adapt and adjust, consistently creating food that delights with perfect textural contrast and optimal moisture retention. This is the hallmark of truly skilled cooking—not following recipes blindly, but understanding the why behind every technique and applying that knowledge thoughtfully to create exceptional food every time you cook. 🍽️